
Share a link
How to Reduce Autofluorescence
Autofluorescence can present major challenges for scientific research, where it may be mistakenly identified as positive staining or may mask the detection of scarce targets. To make sense of experimental data when performing techniques such as immunocytochemistry (ICC), immunohistochemistry (IHC), and flow cytometry, autofluorescence should be reduced wherever possible.

What is autofluorescence?
Autofluorescence is a term used to describe the background fluorescence present in biological samples which cannot be directly attributed to the fluorophore-labeled antibodies used for target detection. When performing techniques such as ICC, IHC, and flow cytometry, autofluorescence can make distinguishing between specific signal and unwanted noise challenging. For this reason, it is important to identify potential sources of autofluorescence during experimental design and take steps to reduce their impact.
What are some common causes of autofluorescence?
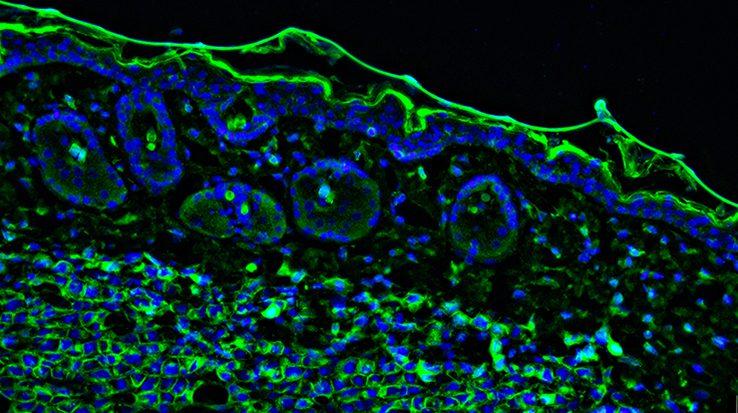
Autofluorescence comes from multiple sources, many of which are endogenous to the sample itself. These include collagen, riboflavin, and the reduced form of nicotinamide adenine dinucleotide (NADH), all of which absorb light in the UV to blue range (355-488 nm) and emit in the blue to green spectrum (350-550 nm).
Other naturally fluorescent biomolecules are the lipofuscins, elastin, and the heme group in red blood cells, as well as chlorophyll and lignin in plant samples, which each feature distinct absorbance and emission characteristics.
Autofluorescence can also occur as a result of sample handling. For example, using aldehyde fixatives such as formalin and glutaraldehyde can generate fluorescent products, while failing to remove red blood cells from whole blood or tissue samples can mean the risk of autofluorescence is increased.
Combinations of these factors can exacerbate autofluorescence-related issues. For example, using Alexa-Fluor® 488- or FITC-conjugated antibodies for detecting collagen in aldehyde-fixed kidney samples is known to be problematic.
How can autofluorescence be addressed?
The best way of determining whether autofluorescence is likely to be an issue is to run an unlabeled control. This means treating experimental samples as per usual, but without adding labeled antibody reagents. If autofluorescence is detected, it can be addressed in one (or more) of several ways, depending on the experimental technique and the type of sample being studied. These include the following:
- Consider switching to a different culture vessel– for example, when performing ICC, glass-bottomed microplates may be preferred to polystyrene (a source of autofluorescence).
- Try using an organic solvent (e.g., ice-cold ethanol or methanol) for fixing samples in place of aldehyde-based reagents; if aldehyde-based fixation is unavoidable, keep the fixation time to a minimum and consider treating fixed tissue samples with sodium borohydride to reduce this type of fixative-induced autofluorescence.
- Perfuse tissue samples with phosphate buffered saline (PBS) prior to fixation to remove red blood cells; if this is not possible (e.g., for post-mortem samples or embryonic tissue), try introducing an autofluorescence reducing treatment (e.g., ultraviolet light, ammonia, copper sulfate, Sudan Black B, sodium borohydride, or Trypan Blue) into your experimental workflow.
- Lyse red blood cells to remove them from whole blood prior to immunostaining for flow cytometry.
- Use a viability dye to gate out dead cells (a source of autofluorescence) during flow cytometry analysis.
- For live-cell imaging, consider using a medium that is free of phenol-red, fetal bovine serum (FBS), and other additives that produce autofluorescence, but test this with your cells first to avoid causing unwanted phenotypic changes.
- Select fluorophores carefully – look for dyes that are spectrally distinct from the observed autofluorescence (far red dyes such as Alexa Fluor® 647 are often a good choice as autofluorescence is rarely seen at these wavelengths) and consider using fluorophores with narrow excitation and emission spectra (e.g., Alexa Fluor® dyes) which are more easily distinguished from background.
- Titrate fluorophore reagents to maximize the signal-to-background ratio.
- Optimize instrument settings (e.g., photomultiplier tube voltages for flow cytometry or the size of the detection window for microscopes fitted with a spectral detector) to maximize experimental sensitivity.
- Always include appropriate controls to fully understand your data.
We offer an extensive selection of fluorophore-labeled antibodies, including antibodies labeled with far red dyes, which are validated for techniques including ICC, IHC, and flow cytometry.


